写在最前:目前市面上比较成熟的资讯类APP都会有夜间模式,一些偏娱乐的APP甚至会有多主体切换功能。网上关于主题的相关文章可能也不少了,其实单纯关于整体色调的改变并实现起来并不困难。本文讨论一种更加深度主题的切换,即页面上的所有元素(包括文字颜色,图片,字符串等)都能够根据不同的主题使用而不同,并且每个主题包是独立于APP本身的,可以从服务器上下载下来(也是一个APK文件),然后类似于插件资源的加载,根于业务来应用某一个APK里面的对应主题资源。
1.一个从零开始的demo
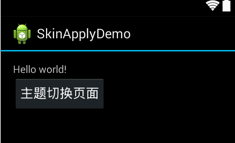
这次的demo有两个页面,首页是SkinApplyMainActivity,xml布局长这样
这里有必要说明下这个layout里面对应控件的id,后面会用到:
- 最外面是一个
LinearLayout,id是skin_root_layout。 - 上面的
TextView的id是skin_text1。 - 下面的
Button的id为next_page。
命名不是很规范,将就看了。
点击button,跳转到另一个名为OtherActivity的activity。
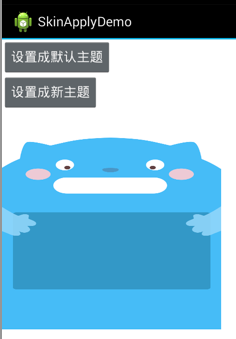
看看这个OtherActivity:
- 最外层的
LinearLayout叫root_layout。 - 第一个
Button的id是skin_default_theme_btn。 - 第二个
Button的id是skin_new_theme_btn。 下面还有张图片,叫做
skin_other_img。
页面相关的先介绍到这里,需要主要的是,这两个activity继承一个基类BaseActivity,这个基类主要是保证子类具有更换主题的能力,所以重点就在这里了,先贴出来溜溜:
```java
public class BaseActivity extends Activity implements ISkinUpate {
private ListcustomValues;
private String baseLastThemeId;public void onResume() {
  super.onResume();
  updateTheme();
}
protected SkinPackageManager getSkinPackageManager() {
return SkinPackageManager.getInstance(this);}
public List
getSkinCustomValues() { return customValues;}
@Override
public boolean updateTheme() {if (!applyTheme()) { return false; } if (isThemeApplied()) { return false; } SkinPackageManager skinManager = SkinPackageManager.getInstance(getApplicationContext()); baseLastThemeId = skinManager.getCurSkinTheme(); customValues = SkinApplyHandler.applySkin(this, this.getClass().getSimpleName(), getWindow().getDecorView()); return true;}
/**
- 主题是否已应用
@return
*/
public boolean isThemeApplied() {
SkinPackageManager skinManager = SkinPackageManager.getInstance(getApplicationContext());
if (skinManager.getCurSkinTheme().equals(baseLastThemeId)) {return true;}
return false;
}@Override
public boolean applyTheme() {
return true;
}
}
通过这个类我们可以比较容易看出核心所在,就这几个类没跑了,它们是`ISkinUpate`,`SkinPackageManager`和`SkinApplyHandler`,把这三个东东搞定了,这篇文章也就差不多了,那么撸起袖子,换一小节接着来吧。


#### 2.主题应用的几把刀
一切还是从`BaseActivity`说起吧,从刚刚上面的代码我们可以看到在`onResume`里面调用了一个`updateTheme`方法,这是一个接口的重载方法,先看这个`ISkinUpate`吧:
```java
public interface ISkinUpate {
    public abstract boolean updateTheme();

    abstract boolean applyTheme();
}
第一个就是我们在基类实现的应用主题的核心方法,第二个是用来控制是否应用主题的。
回到BaseActivity里面来,看到updateTheme里面首先有两个判断,第一个当然就是说,如果不应用主题当然就不继续执行下去了,那么isThemeApplied方法是什么呢,看代码简单猜一下其实很容易看出来,就是应用主题的时候会看看需要应用的主题是不是就是当前主题,如果是就不需要继续应用了,性能能省则省对吧。
然后可以看看SkinPackageManager了,又是一个manager,套路已经很深了,所以它首先肯定是这样的:
public static SkinPackageManager getInstance(Context mContext) {
    if (mInstance == null) {
        synchronized (lock) {
            if (mInstance == null) {
                mInstance = new SkinPackageManager(mContext);
            }
        }
    }
    return mInstance;
}
接下来应该关注下它的构造方法:
private SkinPackageManager(Context mContext) {
        this.mContext = mContext;
        try {
            File file = Environment.getExternalStorageDirectory();//mContext.getFilesDir();
            if (file != null) {
                file = new File(file, SKIN_DIR);
                if (!file.exists()) {
                    file.mkdirs();
                }
                themeRootPath = file.getAbsolutePath();
            }
        } catch (Exception e) {

        }
    }
构造函数初始化了themeRootPath变量,这个变量就是指向主题APK的绝对路径。
然后我们看到BaseActivity里面的updateTheme首先是调用了getCurSkinTheme方法,那我们来看看:
public String getCurSkinTheme() {
        if (curTheme == null) {
            curTheme = SPSetting.getAppSkinTheme();
        }
        if (curTheme == null) {
            curTheme = DEFAULT_THEME;
        }
        return curTheme;
    }
SPSetting就是SharedPreferences啦,在这里插播一下SP的设计封装。
看看SPSetting里面的代码:
public class SPSetting {
    public static final String SETTING = "setting";
    private static final String SKIN_THEME = "skin_theme";

    public static void saveAppSkinTheme(String theme) {
        PrefsMgr.putString(SETTING, SKIN_THEME, theme);
    }

    public static String getAppSkinTheme() {
        return PrefsMgr.getString(SETTING, SKIN_THEME, null);
    }
}
很明显它是封装了具体业务的,然后使用了一个PrefsMgr的类,那来看看这个:
public class PrefsMgr {
    public static int getInt(String tbl, String key, int def) {
        if (MyApplication.getInstance() == null) {
            return def;
        }
        SharedPreferences prefs = MyApplication.getInstance().getWenbaSharedPreferences(tbl);
        return prefs.getInt(key, def);
    }

    public static long getLong(String tbl, String key, long def) {
        if (MyApplication.getInstance() == null) {
            return def;
        }
        SharedPreferences prefs = MyApplication.getInstance().getWenbaSharedPreferences(tbl);
        return prefs.getLong(key, def);
    }

    public static String getString(String tbl, String key, String def) {
        if (MyApplication.getInstance() == null) {
            return def;
        }
        SharedPreferences prefs = MyApplication.getInstance().getWenbaSharedPreferences(tbl);
        return prefs.getString(key, def);
    }

    public static boolean getBoolean(String tbl, String key, boolean def) {
        if (MyApplication.getInstance() == null) {
            return def;
        }
        SharedPreferences prefs = MyApplication.getInstance().getWenbaSharedPreferences(tbl);
        return prefs.getBoolean(key, def);
    }

    public static float getFloat(String tbl, String key, float def) {
        if (MyApplication.getInstance() == null) {
            return def;
        }

        SharedPreferences prefs = MyApplication.getInstance().getWenbaSharedPreferences(tbl);
        return prefs.getFloat(key, def);
    }

    public static void putInt(String tbl, String key, int value) {
        SharedPreferences prefs = MyApplication.getInstance().getWenbaSharedPreferences(tbl);
        SharedPreferences.Editor editor = prefs.edit();
        editor.putInt(key, value);
        editor.apply();
    }

    public static void putLong(String tbl, String key, long value) {
        SharedPreferences prefs = MyApplication.getInstance().getWenbaSharedPreferences(tbl);
        SharedPreferences.Editor editor = prefs.edit();
        editor.putLong(key, value);
        editor.apply();
    }

    public static void putString(String tbl, String key, String value) {
        SharedPreferences prefs = MyApplication.getInstance().getWenbaSharedPreferences(tbl);
        SharedPreferences.Editor editor = prefs.edit();
        editor.putString(key, value);
        editor.apply();
    }

    public static void putBoolean(String tbl, String key, boolean value) {
        SharedPreferences prefs = MyApplication.getInstance().getWenbaSharedPreferences(tbl);
        SharedPreferences.Editor editor = prefs.edit();
        editor.putBoolean(key, value);
        editor.apply();
    }

    public static void putFloat(String tbl, String key, float value) {
        SharedPreferences prefs = MyApplication.getInstance().getWenbaSharedPreferences(tbl);
        SharedPreferences.Editor editor = prefs.edit();
        editor.putFloat(key, value);
        editor.apply();
    }
}
原来如此,PrefsMgr封装的才是真正的sp,然后SPSetting做了二次业务封装,以后有相关的sp需求就统一在SPSetting管理就行了,简单而实用吧。
最后补上在Application里面获得SP实例的代码:
public SharedPreferences getWenbaSharedPreferences(String tbl) {
    return getSharedPreferences(tbl, Context.MODE_PRIVATE);
}
回到BaseActivity里的updateTheme,通过getCurSkinTheme方法取得当然的主题,在这之前会用isThemeApplied判断当前主题是否跟上一次主题一样的,如果是就不继续应用了。
所以真正的核心就是customValues = SkinApplyHandler.applySkin(this, this.getClass().getSimpleName(), getWindow().getDecorView());这句话没跑啦。直接上代码先:
public static List<CustomValue> applySkin(Context context, String skinConfigName, View rootView) {
        if (sCommonConfig == null) {
            initCommonConfig(context);
        }

        return new SkinApply(context, skinConfigName, sCommonConfig, rootView).apply();
    }
sCommonConfig是个标识为,如果为空就调用initCommonConfig方法,这个方法一会儿再看,先继续往下走到return的那个地方,new了一个名为SkinApply的类,并且调用了apply方法。
看来核心真心还隐藏得挺深的,层层剥开吧。
    public SkinApply(Context context, String skinConfigName, ThemeConfig commConfig, View rootView) {
        this.context = context;
        this.rootView = rootView;
        this.skinConfigName = skinConfigName;
        this.commConfig = commConfig;
        this.mSkinPackageManager = SkinPackageManager.getInstance(context);
    }
构造函数里面初始化了一些变量,当然后面是又用的,直接看看apply方法是干什么的就好。
public List<CustomValue> apply() {
        ThemeConfig thisConfig = null;
        try {
            // get specific name
            String fileName = "skin/config/" + skinConfigName + ".xml";
            thisConfig = SkinApplyHandler.parseThemeAsset(context, fileName);
            if (thisConfig == null) {
                Log.d("skin", "no config skinConfigName = " + skinConfigName);
                // apply common config
                applyThemeConfig(commConfig);
                return null;
            }

            if (thisConfig.applyCommonAttrbiute) {
                applyThemeConfig(commConfig);
            }

            applyThemeConfig(thisConfig);

        } catch (Exception e) {
            Log.w("wenba", e);
        }

        return thisConfig.customValueList;
    }
这里也有comm相关的字眼,那只能简单说一下了,commConfig也就是从刚刚外面传进来的,相当于是一个页面的公共配置,在这里配一下就相当于在每个使用主题的页面都使用这个主题配置了,和基类子类的概念差不多,基类的行为是所有子类公共的,子类的行为是自己所独有的。
所以现在来看apply的代码还是比较清晰了吧。
- 首先在特定的文件目录下面去找特定名称的xml。
然后
SkinApplyHandler.parseThemeAsset获得自己特定的config,如果为空则只加载公共的主题配置,如果不为空则先加载公共的,在加载自己的。
这个config的类型是ThemeConfig,可以来看看了:public static class ThemeConfig { public static final String NODE_THEME_ROOT = "ThemeRoot"; public static final String NODE_COLORS = "colors"; public static final String NODE_DRAWABLES = "drawables"; public static final String NODE_STRINGS = "strings"; public static final String NODE_APPLY_COMMON_ATTRIBIUTE = "applyCommonAttrbiute"; public static final String NODE_CONFIG_ITEM = "ConfigItem"; public static final String NODE_METHOD_CALL = "MethodCall"; public static final String NODE_CUSTOM_VALUE = "CustomValue"; public static final String NODE_VALUE_DEF = "ValueDef"; public static final String ATTR_VIEW_ID = "viewId"; public static final String ATTR_METHOD = "method"; public static final String ATTR_RES_NAME = "resName"; public static final String ATTR_SPECIAL_THEME = "specialTheme"; public static final String ATTR_NAME = "name"; public static final String ATTR_VALUE = "value"; public static final String ATTR_TYPE = "type"; public boolean applyCommonAttrbiute; public List<ConfigItem> colorList; public List<ConfigItem> drawableList; public List<ConfigItem> stringList; public List<CustomValue> customValueList; }看上去很复杂对吧,那先不管吧,继续看上一步。
apply方法里面现在有两个核心的方法parseThemeAsset和applyThemeConfig,先看第一个:/** * 格式皮肤配置xml,转化为ThemeConfig Bean * * @param name * @return */ public static ThemeConfig parseThemeAsset(Context context, String name) { InputStream inputStream = null; ThemeConfig themeConfig = null; try { inputStream = context.getResources().getAssets().open(name); if (inputStream == null) { return null; } XmlPullParser parser = Xml.newPullParser(); parser.setInput(inputStream, "utf-8"); int event = -1; while ((event = parser.next()) != XmlPullParser.END_DOCUMENT) { if (event != XmlPullParser.START_TAG) { continue; } String nodeTag = parser.getName(); if (ThemeConfig.NODE_COLORS.equals(nodeTag)) { themeConfig.colorList = parseConfigGroup(parser); } else if (ThemeConfig.NODE_DRAWABLES.equals(nodeTag)) { themeConfig.drawableList = parseConfigGroup(parser); } else if (ThemeConfig.NODE_STRINGS.equals(nodeTag)) { themeConfig.stringList = parseConfigGroup(parser); } else if (ThemeConfig.NODE_CUSTOM_VALUE.equals(nodeTag)) { themeConfig.customValueList = parseCustomValueGroup(parser); } else if (ThemeConfig.NODE_APPLY_COMMON_ATTRIBIUTE.equals(nodeTag)) { String value = parser.getAttributeValue(null, "value"); if (value != null && value.equalsIgnoreCase("true")) { themeConfig.applyCommonAttrbiute = true; } else { themeConfig.applyCommonAttrbiute = false; } } else if (ThemeConfig.NODE_THEME_ROOT.equals(nodeTag)) { if (parser.getDepth() == 1) { themeConfig = new ThemeConfig(); } else { throw new Exception("ThemeRoot was in wrong place"); } } } return themeConfig; } catch (Exception e) { Log.w("wenba", e); } finally { // close input stream BaseStoreUtil.closeObject(inputStream); } return themeConfig; }现在知道为什么
ThemeConfig为什么这么多了吧,前面的常量都是用来解析xml的,也只有最后面几个变量是后来有用的。里面主要通过两个方法来解析,一个一个看看:/** * 解析ConfigItem 节点,转化为ConfigItem集合 * * @param parser * @return */ private static List<ConfigItem> parseConfigGroup(XmlPullParser parser) { if (parser == null || parser.getDepth() != 2) { return null; } int event = -1; int depth = parser.getDepth(); List<ConfigItem> itemList = new ArrayList<ConfigItem>(); ConfigItem configItem = null; try { while ((event = parser.next()) != XmlPullParser.END_TAG || (parser.getDepth() > depth && event != XmlPullParser.END_DOCUMENT)) { if (event != XmlPullParser.START_TAG) { continue; } String nodeTag = parser.getName(); if (ThemeConfig.NODE_CONFIG_ITEM.equals(nodeTag)) { configItem = new ConfigItem(); configItem.idName = parser.getAttributeValue(null, ThemeConfig.ATTR_VIEW_ID); if (parser.getAttributeCount() >= 3) { MethodCall call = new MethodCall(); call.methodName = parser.getAttributeValue(null, ThemeConfig.ATTR_METHOD); call.resName = parser.getAttributeValue(null, ThemeConfig.ATTR_RES_NAME); call.special = parser.getAttributeValue(null, ThemeConfig.ATTR_SPECIAL_THEME); configItem.addMethodCall(call); } else { // parse method group configItem.addMethodCall(parseMethodCalls(parser)); } itemList.add(configItem); } } } catch (Exception e) { Log.w("wenba", e); } return itemList; }反射的过程就不再深究了,把对应的实体类也贴出来看看吧:
public static class ConfigItem {
      public String idName;
      public List<MethodCall> methodCalls;

      public ConfigItem() {
          methodCalls = new ArrayList<MethodCall>();
      }

      public void addMethodCall(MethodCall call) {
          methodCalls.add(call);
      }

      public void addMethodCall(List<MethodCall> calls) {
          methodCalls.addAll(calls);
      }
  }

  public static class MethodCall {
      public String methodName;
      public String resName;
      public String special;
  }
所以
parseConfigGroup这个方法把xml配置的颜色,图片,文字都能解析出来,方法对应的JAVA对象中。
后面还有一个customValueList是什么呢,这个和上面几个不太一样,前几个属性在xml配置后在java代码里面就不需要怎么操作了,而customValue不一样,它不会具体应用到某一个view上面,而是运行时把反射出来颜色图片等返回到java中让开发者自己处理,这一点很重要,因为我们配置的xml都是针对页面的,有些没有页面的地方(例如adpter)就需要使用customValue来处理主题元素。customValue是通过名为parseCustomValueGroup的方法解析的,来看看:private static List<CustomValue> parseCustomValueGroup(XmlPullParser parser) { if (parser == null || parser.getDepth() != 2) { return null; } int event = -1; int depth = parser.getDepth(); List<CustomValue> itemList = new ArrayList<CustomValue>(); CustomValue configItem = null; try { while ((event = parser.next()) != XmlPullParser.END_TAG || (parser.getDepth() > depth && event != XmlPullParser.END_DOCUMENT)) { if (event != XmlPullParser.START_TAG) { continue; } String nodeTag = parser.getName(); if (ThemeConfig.NODE_VALUE_DEF.equals(nodeTag)) { configItem = new CustomValue(); if (parser.getAttributeCount() >= 2) { configItem.name = parser.getAttributeValue(null, ThemeConfig.ATTR_NAME); configItem.value = parser.getAttributeValue(null, ThemeConfig.ATTR_VALUE); configItem.type = parser.getAttributeValue(null, ThemeConfig.ATTR_TYPE); configItem.special = parser.getAttributeValue(null, ThemeConfig.ATTR_SPECIAL_THEME); } itemList.add(configItem); } } } catch (Exception e) { Log.w("wenba", e); } return itemList; } public static class CustomValue { public String name; public String value; public String type; public String special; }基本上也是大同小异啦。以上就是xml的解析了,当然只有解析肯定不够还有应用啦,回到
apply方法里面,下面那个核心方法applyThemeConfig走起。/** * 对所有类别的配置参数与对应的组件进行匹配 * * @param themeConfig * @throws Exception */ private void applyThemeConfig(ThemeConfig themeConfig) throws Exception { if (themeConfig == null) { return; } // colors List<ConfigItem> colorArray = themeConfig.colorList; if (colorArray != null && colorArray.size() > 0) { try { applyThemeColors(colorArray); } catch (Exception e) { Log.w("wenba", e); } } // drawables List<ConfigItem> drawableArray = themeConfig.drawableList; if (drawableArray != null && drawableArray.size() > 0) { try { applyThemeDrawables(drawableArray); } catch (Exception e) { Log.w("wenba", e); } } // strings List<ConfigItem> stringArray = themeConfig.stringList; if (stringArray != null && stringArray.size() > 0) { try { applyThemeStrings(stringArray); } catch (Exception e) { Log.w("wenba", e); } } }看上去简单清楚明了吧,把颜色图片字符串顺着应用一下就行了,当然怎么应用的,又要贴代码了:
/**
   * 对color配置参数进行组件与参数的匹配组合
   *
   * @param colorArray
   * @throws Exception
   */
  private void applyThemeColors(List<ConfigItem> colorArray) throws Exception {
      applyConfigGroup(colorArray, new ApplyConfigListener() {

          @Override
          public void applyMethodCall(View view, MethodCall call) throws NoSuchMethodException,
                  IllegalAccessException, IllegalArgumentException, InvocationTargetException {

              String methodName = call.methodName;
              String resName = call.resName;
              boolean isSpecial = false;
              try {
                  isSpecial = Boolean.parseBoolean(call.special);
              } catch (Exception e) {
                  Log.w("wenba", e);
              }
              int color = mSkinPackageManager.getThemeColor(resName, isSpecial);

              Method method = view.getClass().getMethod(methodName, new Class[] { int.class });
              if (method == null) {
                  return;
              }

              method.setAccessible(true);
              method.invoke(view, color);
          }
      });
  }

  /**
   * 对drawable配置参数进行组件与参数的匹配组合
   *
   * @param drawableArray
   * @throws Exception
   */
  private void applyThemeDrawables(List<ConfigItem> drawableArray) throws Exception {
      applyConfigGroup(drawableArray, new ApplyConfigListener() {

          @Override
          public void applyMethodCall(View view, MethodCall call) throws NoSuchMethodException,
                  IllegalAccessException, IllegalArgumentException, InvocationTargetException {

              String methodName = call.methodName;
              String resName = call.resName;
              boolean isSpecial = false;
              try {
                  isSpecial = Boolean.parseBoolean(call.special);
              } catch (Exception e) {
                  Log.w("wenba", e);
              }

              Drawable drawable = mSkinPackageManager.getThemeDrawable(resName, isSpecial);
              if (drawable == null) {
                  return;
              }
              int paddingLeft = 0;
              int paddingTop = 0;
              int paddingRight = 0;
              int paddingBottom = 0;

              boolean needPaddingSet = drawable.getPadding(new Rect());

              if (needPaddingSet) {
                  paddingLeft = view.getPaddingLeft();
                  paddingTop = view.getPaddingTop();
                  paddingRight = view.getPaddingRight();
                  paddingBottom = view.getPaddingBottom();

                  if (paddingLeft == 0 && paddingTop == 0 && paddingRight == 0 && paddingBottom == 0) {
                      needPaddingSet = false;
                  }
              }

              if ("setBackgroundDrawable".equals(methodName)) {
                  if (android.os.Build.VERSION.SDK_INT >= 16) {
                      methodName = "setBackground";
                  }
              }

              Method method = view.getClass().getMethod(methodName, new Class[] { Drawable.class });
              if (method == null) {
                  return;
              }

              method.setAccessible(true);
              method.invoke(view, drawable);

              if (needPaddingSet) {
                  view.setPadding(paddingLeft, paddingTop, paddingRight, paddingBottom);
              }

          }
      });
  }

  /**
   * 对string配置参数进行组件与参数的匹配组合
   *
   * @param stringArray
   * @throws Exception
   */
  private void applyThemeStrings(List<ConfigItem> stringArray) throws Exception {
      applyConfigGroup(stringArray, new ApplyConfigListener() {

          @Override
          public void applyMethodCall(View view, MethodCall call) throws NoSuchMethodException,
                  IllegalAccessException, IllegalArgumentException, InvocationTargetException {

              String methodName = call.methodName;
              String resName = call.resName;

              String str = mSkinPackageManager.getThemeString(resName);
              if (str == null) {
                  return;
              }

              Method method = view.getClass().getMethod(methodName, new Class[] { CharSequence.class });
              if (method == null) {
                  return;
              }

              method.setAccessible(true);
              method.invoke(view, str);

          }
      });
  }
虽然这一块是整个代码结构的真正核心,但是好像看一下代码比一大堆废话来解释好很多,需要注意一下的是以上三个方法都调用了
applyConfigGroupprivate void applyConfigGroup(List<ConfigItem> configList, ApplyConfigListener listener) { if (configList == null) { return; } for (int i = 0; i < configList.size(); i++) { ConfigItem itemObject = configList.get(i); String idName = itemObject.idName; if (idName == null) { continue; } int viewId = getViewId(idName); if (viewId <= 0) { Log.d("skin", "applyConfigGroup: no viewId found name = " + idName + " skinConfigName = " + skinConfigName); continue; } View view = rootView.findViewById(viewId); if (view == null) { Log.d("skin", "applyConfigGroup: no view found viewId = " + idName + " skinConfigName = " + skinConfigName); continue; } for (MethodCall call : itemObject.methodCalls) { try { listener.applyMethodCall(view, call); } catch (NoSuchMethodException e) { Log.w("wenba", e); } catch (IllegalAccessException e) { Log.w("wenba", e); } catch (IllegalArgumentException e) { Log.w("wenba", e); } catch (InvocationTargetException e) { Log.w("wenba", e); } catch (Exception e) { Log.w("wenba", e); } } } }注意这里还有个监听器
ApplyConfigListener:private static interface ApplyConfigListener { public void applyMethodCall(View view, MethodCall call) throws NoSuchMethodException, IllegalAccessException, IllegalArgumentException, InvocationTargetException; }上面三块代码一起看比较能看出整体结构来,最后补上
getViewId的代码:private int getViewId(String idName) { return context.getResources().getIdentifier(idName, "id", context.getPackageName()); }到目前为止就已经把关于更新主题的基本流程分析完了,比较偏向于原理,接下来看看从应用层的使用方法。
3.如何配置与使用主题
还记得最开始的那个OtherActivity的截图吗,点击“设置成新主题”会执行如下代码:
SkinPackageManager.getInstance(getApplicationContext()).loadSkin("SkinApple", new LoadSkinCallBack() {

                @Override
                public void loadSkinSuccess() {
                    Log.d("kkkkkkkk", "loadSkinSuccess");
                    updateTheme();
                }

                @Override
                public void loadSkinFail() {
                    Log.d("kkkkkkkk", "loadSkinFail");
                }

            });
执行的是一个loadSkin方法,所以理所当然地看这个方法了:
/**
     * 加载皮肤资源, 同步加载
     *
     * @param dexPath
     *            需要加载的皮肤资源
     * @param callback
     *            回调接口
     */
    public void loadSkin(String themeId, final LoadSkinCallBack callback) {

        // 当为默认皮肤时,加载本地资源
        if (DEFAULT_THEME.equals(themeId)) {
            resetDefaultSkin(callback);
            return;
        }

        Resources resources = loadSkinById(themeId);
        if (resources != null) {
            curTheme = themeId;
            mResources = resources;
            if (callback != null) {
                callback.loadSkinSuccess();
            }
        } else {
            if (callback != null) {
                callback.loadSkinFail();
            }
        }

    }
如果themeId为默认的则执行resetDefaultSkin方法
    public void resetDefaultSkin(LoadSkinCallBack callback) {
        Resources resources = mContext.getResources();
        if (resources != null) {
            mResources = resources;
            curTheme = DEFAULT_THEME;
            SPSetting.saveAppSkinTheme(DEFAULT_THEME);
            if (callback != null) {
                callback.loadSkinSuccess();
            }
        } else {
            if (callback != null) {
                callback.loadSkinFail();
            }
        }
    }
其实主要就是拿对应的resources了,所以可以继续往下看,如果不是默认主题,那么会通过themeId来使用loadSkinById方法获得相应主题的Resources,是怎么获取到的呢,themeId又是什么鬼呢,继续看吧。
private Resources loadSkinById(String themeId) {
        Resources resources = null;
        String dexPath = loadSkinPackagePath(themeId);
        PackageInfo mInfo = getSkinPackageInfo(dexPath);
        if (mInfo == null) {
            return resources;
        }

        AssetManager assetManager;
        try {
            assetManager = AssetManager.class.newInstance();

            Method addAssetPath = assetManager.getClass().getMethod("addAssetPath", String.class);
            addAssetPath.invoke(assetManager, dexPath);

            Resources superRes = mContext.getResources();
            resources = new Resources(assetManager, superRes.getDisplayMetrics(), superRes.getConfiguration());
        } catch (Exception e) {
            Log.w("wenba", e);
        }
        return resources;
    }
如果你看过之前插件的那篇文章一定知道了,这个简直是异曲同工啊有木有,大概意思就是通过反射AssetManager的这个addAssetPath方法,把主题APK的路径注入进去,这样的assetManager生成的resources就可以在这个指定的路径下面去找资源文件了,所以loadSkinPackagePath大概也能猜出来是干啥的了。
/**
     * 获得皮肤资源的绝对路径
     *
     * @param apkName
     * @return
     */
    public String loadSkinPackagePath(final String skinId) {
        File dir = new File(themeRootPath);
        if (!dir.exists()) {
            dir.mkdirs();
        }

        File[] apkFiles = dir.listFiles(new FileFilter() {

            @Override
            public boolean accept(File pathname) {
                if (!pathname.isFile()) {
                    return false;
                }

                if (!pathname.getName().startsWith(skinId)) {
                    return false;
                }

                return true;
            }
        });

        // load and delete old files if need
        if (apkFiles == null || apkFiles.length == 0) {
            return null;
        }

        if (apkFiles.length == 1) {
            return apkFiles[0].getName().matches(".*\\.apk") ? apkFiles[0].getAbsolutePath() : null;
        } else {
            int version = parseApkVersion(apkFiles[0].getName());
            File target = apkFiles[0];

            for (File file : apkFiles) {
                int flagVer = parseApkVersion(file.getName());
                if (flagVer > version) {
                    version = flagVer;

                    target.delete();
                    target = file;
                }
            }

            return target.getAbsolutePath();
        }
    }
这个时候知道themeId是什么的吧,其实就是一个apk的前缀,通过这个前缀去找符合要求的apk,然后后面根据文件名判断找版本最高的返回:
private int parseApkVersion(String name) {
        Pattern pattern = Pattern.compile("-(\\d+)\\.apk");
        Matcher matcher = pattern.matcher(name);
        if (matcher.find()) {
            String version = matcher.group(1);
            int verInt = 0;
            try {
                verInt = Integer.parseInt(version);
            } catch (Exception e) {
                // TODO: handle exception
            }
            return verInt;
        }
        return 0;
    }
返回到loadSkinById方法,dexPath算是初始化完成了,后面还有个getSkinPackageInfo方法,如果这个方法返回为空的话,就直接返回一个空的resources,就是明摆着不让用了哎。
    private PackageInfo getSkinPackageInfo(String dexPath) {
        if (dexPath == null) {
            return null;
        }
        String sign = AppInfoUtils.getApkSignature(mContext, dexPath);
        String localSign = "A6:08:A8:28:1A:BF:55:AF:A4:72:9A:F4:F6:34:06:CF:16:EF:BB:A2";
        if (sign == null || (localSign != null && localSign.equals(sign))) {// 对主题包进行签名认证
            PackageManager mPm = mContext.getPackageManager();
            PackageInfo mInfo = mPm.getPackageArchiveInfo(dexPath, 0);
            return mInfo;
        }
        return null;
    }
原来是签名认证,有点意思了吧,获得apk的签名和合法的签名文件进行比对,如果是同一个就认证通过,不是的话就返回空了,虽然这样写也并不是很安全,但是的确是一种提醒。这个在APP开发,插件化开发中都具有重要意义,属于安全环节中不可缺少的一步了,安全无小事,切记切记。
拿到了我们需要的resources,问题就迎刃而解了,先封装出去:
    public Resources getThemeResources() {
        if (mResources == null) {
            synchronized (this) {
                if (mResources == null) {
                    mResources = mContext.getResources();
                    curTheme = DEFAULT_THEME;
                }
            }
        }
        return mResources;
    }
再随便来看一个,比如是图片:
public Drawable getThemeDrawable(String drawableName, boolean isSpecial) {
        Resources resources = getThemeResources(isSpecial);

        int resId = getThemeResourceId(drawableName, "drawable", isSpecial);
        if (resId <= 0) {
            return null;
        }
        try {
            return resources.getDrawable(resId);
        } catch (OutOfMemoryError e) {
            Log.w("wenba", e);
            Log.e("skin", "OutOfMemoryError: drawableName = " + drawableName);
        }
        return null;
    }
然后就是各种反射调用设置方法了,到处原理性的介绍就到此为止了,原以为比起上两篇来说更简单,其实还是想多了,可能还是没有理太得太清,最好还是配合自己的想法和代码还原来看可能比较容易清楚。
####4.使用实例补充
从以上几个小节基本上也能大概猜出个该怎么使用的,还有些重要的东西没说,在这里补充一下,结合最开始介绍页面和id的地方
在assets–>skin–>config下面建立一个
SkinApplyMainActivity,内容如下:
```xml
<?xml version=”1.0” encoding=”utf-8”?>
建立`OtherActivity`,内容如下:
```xml
<?xml version="1.0" encoding="utf-8"?>
<ThemeRoot>

    <colors>
        <ConfigItem viewId="skin_default_theme_btn" method="setBackgroundColor" resName="theme"/>
        <ConfigItem viewId="skin_new_theme_btn" method="setTextColor" resName="theme"/>
    </colors>

    <drawables>
        <ConfigItem viewId="root_layout" method="setBackgroundDrawable" resName="skin_main_bg"/>
        <ConfigItem viewId="skin_other_img" method="setBackgroundDrawable" resName="skin_word_bg"/>
    </drawables>

    <CustomValue>
        <ValueDef name="skin_digits" value="te_text_hint" type="color"/>
    </CustomValue>

</ThemeRoot>
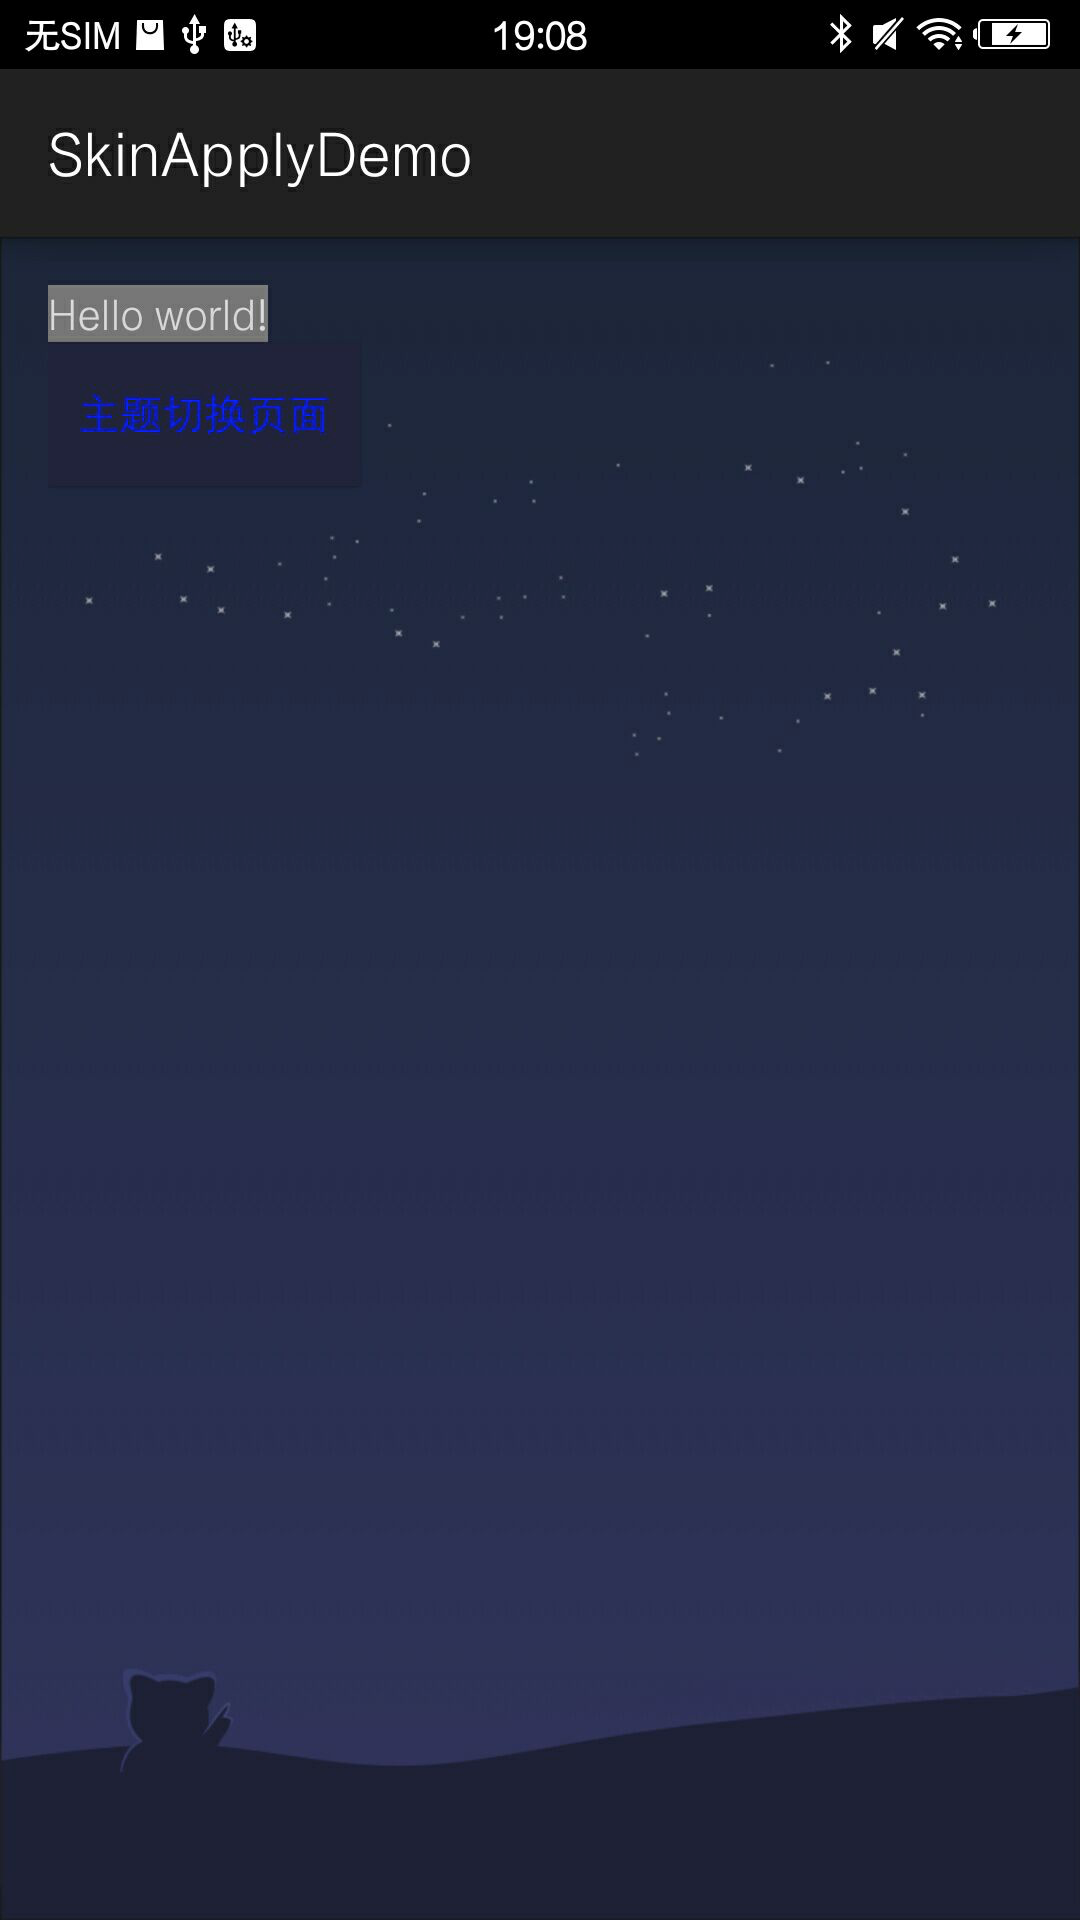
- 最后来四张图说明一切:


转载请注明来源,欢迎对文章中的引用来源进行考证,欢迎指出任何有错误或不够清晰的表达。可以在下面评论区评论,也可以邮件至same4869@126.com


